That Freekick Challenge Perk Tier List & Stat Priorities
Which free-kick perk to take for goals—and how to spend Coins on cards.
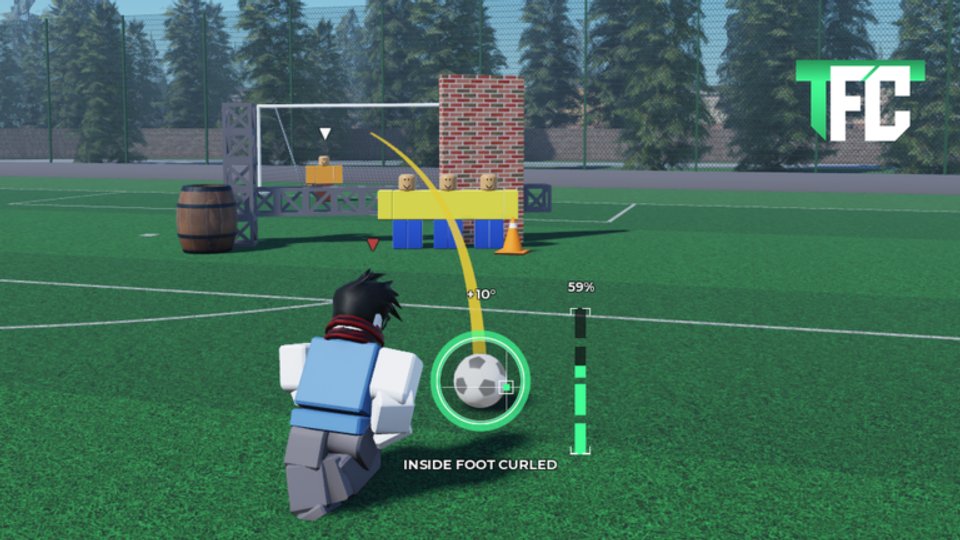
This hub ranks the main scoring perks in That Freekick Challenge (TFC) by NelStud and soft-ranks card stat priorities for beginners versus challenge play. Perks are temporary shot modifiers you apply before a kick; cards raise the four permanent attributes that decide how forgiving that kick feels. Pair this page with Cards & Stats, How to Score, and Free-Kick Setup so you practice the right shot for each pick.
Community write-ups disagree slightly on exact Zone numbers and on perk display names (Fire vs Chrono, Focus vs Foresight). Treat live in-game tooltips as the source of truth after every patch, then use the ranking below as decision logic that still holds when numbers move.
How this tier list is ranked
Criteria focus on scoring reliability in practice and challenge modes—not cosmetics and not rare meme setups. Higher tiers raise your chance of clearing the wall, keeping the ball under the bar, and beating the keeper with less variance. Lower tiers are still useful when they fix a specific weakness (timing or guide reading).
Each perk usually carries a cost (community guides often note a cooldown-style power cost). Do not spam a perk on every warm-up kick; save it for the attempt that matters.
S tier — Zone
Zone temporarily pushes all four free-kick attributes—Accuracy, Precision, Power, and Curve—to a high capped value for that shot, on either foot. Some guides list the temporary values as 84; others report 99. Both agree on the core idea: Zone is a short burst that maxes (or near-maxes) every attribute at once.
When to pick Zone
- Your card is unfinished and base stats still feel thin.
- The wall is dense and you need Accuracy + Curve together to bend cleanly.
- Challenge mode gives you one or two high-stakes kicks and you cannot afford a wild miss.
- You are testing a new angle and want the shot to reflect setup quality, not low attributes.
Zone is the default best scoring perk for most players. It does not teach mechanics by itself—use Getting Started and Controls so you still aim, lift, and time correctly under the boost.
A tier — Rocket
Rocket multiplies launch speed (community ranges cite about 1.3x to 1.5x). The ball leaves the foot faster, which can shrink keeper reaction time on driven or low-arc curls. Critically, Rocket does not rewrite Accuracy for you: shot accuracy and timing still come from your base Power and Precision (and related Accuracy) on the card.
When to pick Rocket
- Your aim and timing are already solid and you only need extra pace.
- You are taking a flatter driven route where hang time hurts more than it helps.
- Zone is on cooldown or unavailable and you still want an aggressive attempt.
When to skip Rocket
- You still miss the timing window often—speed only makes bad contact fail faster.
- You cannot clear the wall cleanly yet; fix height and curve first via Beat the Wall.
Rocket rewards skilled setups. Pair it with a card that already has respectable Precision and Accuracy, covered in depth on the Players Hub.
B tier — Fire / Chrono and Focus / Foresight
These two sit in B because they solve one problem well without lifting the whole shot the way Zone does. Naming differs by source: some UIs and guides say Fire and Focus; others say Chrono and Foresight. Effects match even when labels differ—confirm the tooltip before you spend.
Fire / Chrono — perfect timing at any power
Fire (also called Chrono) grants perfect timing regardless of the Power level you choose. Normally Precision controls how wide the timing window is; this perk removes that timing skill check for the kick. Accuracy error still applies, so the ball can drift even when the meter is timed perfectly.
Pick Fire / Chrono when
- You understand aim and curve but keep mistiming high-Power charges.
- You want to practice power ranges without fighting the timing indicator.
- You are learning How to Score patterns and need timing noise removed.
Skip it when your misses are placement or wall collisions—those need Accuracy, Curve, and setup work, not a free timing lock.
Focus / Foresight — extra grey guide
Focus (also called Foresight) adds a second grey guide that follows your power so you can visualize curve path more clearly. It does not predict wind or random error; the live ball can still leave the grey line.
Pick Focus / Foresight when
- You are learning bend routes around the wall and need a clearer preview.
- You change Power often and want the guide to track those changes.
- You are dialing a new free-kick setup in practice mode.
Skip it when you already read the primary guide well and need raw attribute strength or launch speed instead—Zone or Rocket will convert better.
Soft tier list — card stat priorities
Perks win individual kicks; cards win the long grind. Spend Coins on cards and Perk Points on perks (see Players and redeem rewards on Codes).
Beginners (practice and first challenges)
- Precision — wider timing window so you can learn the meter.
- Accuracy — less random spread so repeated setups feel consistent.
- Curve — enough bend to practice wall clears without extreme contact.
- Power — raise carefully; max Power with poor aim sails over the bar.
Challenge / competitive play
- Accuracy + Curve — reliable placement around the wall into the far post.
- Precision — keep timing stable when nerves and high Power appear.
- Power — enough pace to beat the keeper once the route is clean.
If early codes dump a large Coin stack, buy a balanced card upgrade path rather than dumping everything into Power. Save Perk Points for Zone first when you want a universal scoring tool, then Rocket once your base card can support accurate driven shots.
Recommended loadouts by situation
| Situation | Perk pick | Stat focus |
|---|---|---|
| New account / thin card | Zone | Precision → Accuracy |
| Known curl, need pace | Rocket | Accuracy + Power |
| Timing keeps failing | Fire / Chrono | Precision (long term) |
| Learning wall bends | Focus / Foresight | Curve + Accuracy |
| One-kick challenge | Zone | Balanced card |
Practice loop that makes the tier list matter
- Rebuild the shot in Free-Kick Setup without a perk.
- Note whether the miss was timing, wall, height, or keeper reach.
- Apply the perk that fixes that miss class—not the flashiest name.
- Retest the same angle three times before changing everything.
- Check Updates after patches in case perk values or costs change.
For scripts and client tools discussion, see Scripts (use at your own risk). For official destinations and this wiki’s page map, open Official Links.
Summary
- S — Zone: temporary all-attribute spike; best default scorer; verify live 84 vs 99 values.
- A — Rocket: ~1.3x–1.5x launch speed; accuracy still from your card.
- B — Fire/Chrono: perfect timing, accuracy error remains.
- B — Focus/Foresight: extra grey power-following guide; no wind/error prediction.
- Beginners prioritize Precision and Accuracy on cards; challenge players lean Accuracy, Curve, then Power.
Use this hub as a living meta snapshot. Re-read tooltips after every NelStud patch, redeem fresh rewards on Codes, and deepen execution with the Guides Hub.
Frequently Asked Questions
Quick answers to the most common questions.
Is Zone always the best perk in That Freekick Challenge?
Zone is the safest S-tier pick for most scoring situations because it temporarily raises Accuracy, Precision, Power, and Curve together. Switch to Rocket when your aim is already clean and you only need launch speed, or to Fire/Chrono or Focus/Foresight when timing or guide reading is the real problem.
Does Zone set stats to 84 or 99?
Community guides disagree—some list 84, others 99. Both describe a temporary max (or near-max) of all four attributes. Always check the live perk tooltip in your current build after updates.
Why is Rocket only A tier if it makes the ball faster?
Rocket boosts launch speed (about 1.3x–1.5x) but leaves accuracy tied to your base Power and Precision. Without a solid card and clean timing, the faster ball just misses faster.
Are Fire and Chrono the same perk? What about Focus and Foresight?
Different guides use different names for matching effects: Fire/Chrono grants perfect timing at any power (accuracy error remains); Focus/Foresight adds an extra grey guide that follows power. Confirm the name shown in your client.
Which card stats should beginners upgrade first?
Start with Precision (timing window) and Accuracy (shot consistency), then Curve for wall bends, and raise Power last so you do not sail over the bar. Spend early Coin rewards from codes on that balance rather than max Power alone.
Where should I practice these perk picks?
Use practice setups from the free-kick setup and how-to-score guides, then apply Zone or Rocket only on the attempts that matter. Cross-check card details on the Players hub and patch changes on Updates.