That Freekick Challenge Cards, Stats & Player Builds
How Accuracy, Precision, Power, and Curve shape every free kick.
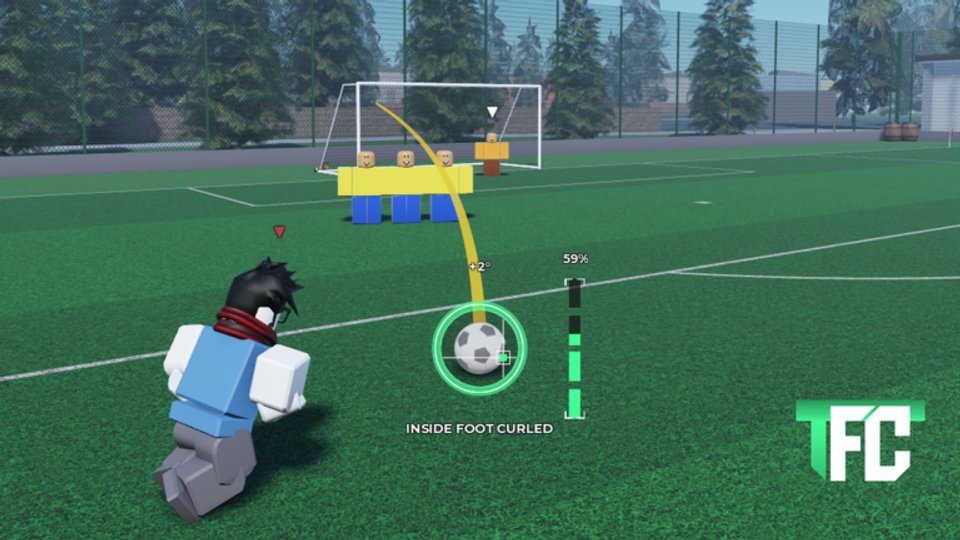
That Freekick Challenge (TFC) by NelStud is a free-kick sandbox: you customize a shot, read the wall and goalkeeper, then challenge other players when you are ready. Your card is the long-term build behind that shot. Four attributes—Accuracy, Precision, Power, and Curve—decide how wide your timing window is, how much random error you eat, how hard you can strike, and how sharply the ball bends.
This hub explains each stat in depth, how Coins buy Cards, how Perk Points unlock Perks, and how to spend early code rewards without wasting progress. Cross-link to the Tier List for perk ranking, How to Score for execution, and Free-Kick Setup for reading the pitch.
The four free-kick stats
No single attribute scores goals alone. A max-Power kick with poor Precision and Accuracy still balloons over the bar or sprays wide. Learn what each dial actually changes before you dump Coins.
Precision — timing window
Precision widens the timing window on the kick indicator. Higher Precision means more room to hit the clean contact zone when you release the charge. Newer players who mistime Space or mouse releases feel this first: the meter looks unfair until Precision grows.
Invest early if you:
- Miss the green/perfect zone often even on familiar power levels.
- Want to practice higher Power without shrinking the timing skill check into a coin-flip.
- Plan to use Rocket later (speed without timing still fails).
Precision does not aim for you. You still watch the indicator and learn the rhythm on Controls. Perks like Fire/Chrono can grant perfect timing for one shot, but building Precision is the permanent fix.
Accuracy — shot error margin
Accuracy reduces random spread and makes Curve behavior more predictable. Community guides also note that higher Accuracy can extend or stabilize the curve guide so repeated setups land closer to the same spot.
High Accuracy helps when you:
- Already know a route (far post curl, near-post dip) and want consistency.
- Keep brushing the wall or missing the frame by small margins.
- Need challenge-mode reliability more than raw boom.
Accuracy will not rescue a bad aim line. Point the trajectory correctly first—see Beat the Wall—then let Accuracy shrink the noise around that line.
Power — kick strength
Power raises the maximum speed and force of the free kick. More Power gives the keeper less time and helps driven shots, but excess Power on a high aim sails over the crossbar. Beginners often over-invest here because the meter feels rewarding; the better habit is learning the 60–65% style scoring band from How to Score before chasing maximum strength.
Raise Power when:
- Your placement is already clean and keepers are reaching soft curls.
- You want Rocket’s launch multiplier to ride on a strong base.
- Challenge layouts demand a flatter, faster path.
Hold Power back when you still clear the wall by luck or constantly hit the bar. Fix height with W/S trajectory control and Curve before adding speed.
Curve — bend
Curve controls how much the ball bends when contact sits off-center (inside-foot curls with Q/E). Higher Curve lets you shape around the wall into corners that a straight kick cannot reach. Small contact changes matter more as Curve rises, so practice in a fixed setup before you trust it in a duel.
Prioritize Curve when:
- The wall blocks the direct lane every time.
- You are learning far-post inside-foot patterns.
- Focus/Foresight’s extra grey guide is teaching you bend routes and you want the live ball to match.
Coins → Cards; Perk Points → Perks
TFC splits progression into two wallets:
- Coins buy or upgrade Cards that raise the four attributes above.
- Perk Points unlock or empower Perks (Zone, Rocket, Fire/Chrono, Focus/Foresight) used before a kick.
Do not treat them as interchangeable. A Coin windfall does not buy Zone; a Perk Point does not raise base Accuracy. Redeem both reward types from Codes (for example large Coin bundles plus occasional Perk Point codes), then spend with intent.
Spending early code rewards wisely
- Redeem every working code after the tutorial (Misc. → Settings → Enter Code).
- Buy a card step that lifts Precision and Accuracy first so practice reps teach you something.
- Add Curve once you can clear a basic wall in practice.
- Add Power in smaller jumps while you retest the same aim line.
- Put early Perk Points toward Zone if you want a universal scoring tool, then Rocket once your card can support accurate driven shots—details on the Tier List.
- Leave a Coin buffer so the next card tier or event shop does not strand you.
Avoid spending the entire EZGOAL / FASTBOI / TFC15M-style Coin pile on a single Power spike. Balanced cards beat glass-cannon meters for challenge prep.
Reading the goalkeeper
Stats shape the shot; keeper reading decides whether that shot is necessary. Before you charge:
- Note starting position—center bias vs cheated toward a post.
- Watch whether the keeper reacts early to lofted balls or stays planted on driven ones.
- Pick a target the keeper is late to: far post behind the wall, or a dipped near-post lane if they hug the far side.
- Change only one variable (height, curve, or power) between attempts so you learn what moved the save.
High Accuracy makes keeper tests fairer because the ball lands where you aimed. High Power punishes keepers who step early—but only if the ball stays under the bar. Pair keeper reads with Free-Kick Setup so wall height and ball spot stay intentional.
Challenge mode prep checklist
Challenge and 1v1 modes punish random tinkering. Prep like this:
- Warm up the exact wall distance and foot preference in practice.
- Confirm your card’s weakest stat and decide whether Zone covers it for the money kick.
- Memorize one primary curl (inside foot, ~low-60s power) and one backup driven line.
- Check perk availability and cost before the attempt—do not discover a cooldown mid-challenge.
- After a miss, classify it: timing (Precision / Fire), spread (Accuracy), wall (Curve / height), or reach (Power / Rocket).
- Skim Updates if something feels patched overnight.
New players should finish Getting Started before grinding ranked challenges. Veterans can jump between this hub, the Tier List, and Guides as their meta shifts.
How stats and perks interact
| Goal | Stat investment | Perk support |
|---|---|---|
| Learn timing | Precision | Fire / Chrono |
| Repeat the same corner | Accuracy | Zone |
| Clear dense walls | Curve + Accuracy | Focus / Foresight while learning; Zone to convert |
| Beat fast keepers | Power + Accuracy | Rocket |
| One-shot challenge | Balanced card | Zone |
Scripts and automation talk lives on Scripts—use caution and follow Roblox rules. Official game and community destinations are listed on Official Links.
Summary
- Precision = timing window; Accuracy = error margin and consistency; Power = kick strength; Curve = bend.
- Coins fund Cards; Perk Points fund Perks—spend code rewards on balance, not vanity Power.
- Read the keeper, lock a practice route, then pick Zone or Rocket from the Tier List when the attempt counts.
- Revisit this hub after patches; attribute feel and shop prices can move with NelStud updates.
Build the card that matches how you actually shoot, then let perks amplify good habits instead of hiding bad ones.
Frequently Asked Questions
Quick answers to the most common questions.
What do Accuracy, Precision, Power, and Curve do in TFC?
Precision widens the timing window, Accuracy reduces shot error and stabilizes placement, Power raises kick strength, and Curve increases bend on off-center contact. You need a mix—maxing only Power usually creates more over-the-bar misses.
What is the difference between Coins and Perk Points?
Coins buy and upgrade Cards that raise the four attributes. Perk Points unlock or improve Perks such as Zone and Rocket. Codes may grant either currency; spend each on its own track.
How should beginners spend early code Coins?
Prioritize Precision and Accuracy first, then Curve for wall clears, and raise Power in smaller steps while retesting the same aim. Keep a Coin buffer for the next card tier instead of dumping everything into one stat.
Which perk should I buy first with Perk Points?
Zone is the best first scoring perk for most players because it temporarily lifts all four attributes. Unlock Rocket once your base card already supports accurate timing and placement.
How do I prepare my card for challenge mode?
Warm up one primary curl and one backup driven shot, know your weakest stat, confirm Zone or Rocket availability, and classify each miss before changing the whole setup. Read the keeper’s starting bias before you charge.
Where can I learn the controls that these stats affect?
Use the Controls and Getting Started guides for inputs, How to Score for the curl-and-power pattern, and Free-Kick Setup for reading the wall. Perk rankings live on the Tier List hub.